
Brow lamination is an awesome way to achieve a fuller looking more natural brow without coloring products. The brow lamination process perms the brow hairs and fixes them in a defined direction for easy styling. Since salon brow lamination can run $150 and only lasts a few weeks, I was excited to find a kit that achieves the same amazing results at home for under $5/session. Let's jump into my experience and a full at-home brow lamination tutorial.

How to Achieve Amazing Brow Lamination Results at Home
What is Brow Lamination
Brow lamination is a new to the US trend that original gained popularity in Russia where a chemical solution is used to smooth and straighten the brow hairs into a defined look. Essentially you are perming the brow hairs and getting them to stay in play for a fuller more uniform look. As someone with thin, sparse brows after chemo, I love brow lamination as a way to create the illusion of fuller brows. The process is very quick. (under and hour) and after having it done in a salon I was determined to find a cheaper way to achieve the results at home.
The kit keeps selling out so I will try to post when I find it in stock with other retailers.
Who Should Try Brow Lamination?
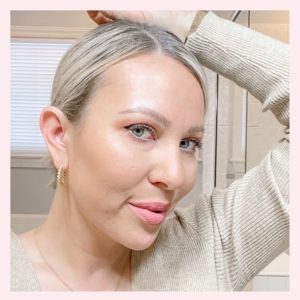
As someone with thin, sparse brows after chemo, I love brow lamination as a way to create the illusion of fuller brows. For those with thicker brows, keep in mind your results will likely be more drastic (lucky you) and you will have a fuller look. Honestly, I encourage everyone to try brow lamination if you like the look of fuller more defined brows.
How Long Does Brow Lamination Last?
Brow lamination chemicals behave differently on different types of hair. On my hair I find the process lasts around 1-2 weeks. After about 1.5 weeks, I find the hairs towards the tail of my brows start to curl up again and don't lay as flat but the front hairs stay straight and defined longer. I play to redo the process every few weeks to keep the full defined look I enjoy. You can also experiment with the length of time you leave the product on but don't exceed the mac length to maintain integrity and health of your hair. I would also suggest taking a break after a few sessions to give your hair a break from the chemicals.

What are the steps in Brow Lamination?
These steps assuming you are using the brow lamination kit I used. If you use a different kit I suggest referring to the kit specific instructions though the process will generally be the same across products.
Step 1
You will cleanse your brows to make sure any dirt, particles and makeup are removed from the area.
Step 2
Then you will apply the cleansing solution to your brows to remove any excess oil/debris. You can also use a micellar water if you don't want to use the cleanser that comes with the kit
Step 3
Put on gloves and gently apply the LIFT solution with the micro applicators that come with the kit. You will brush the product on thickly and position the brows in the direction you wish them to lay.
Step 4
Cover your brows with Saran Wrap and leave the product on for 8-13 minutes. I did 11 minutes for the first time and play to leave it on the full 13 moving forward
Step 5
Once the timer goes off, remove any excess product with a DRY cotton round.
Step 6
Repeat the same application process with the FIXATION solution. Make sure to brush in the direction you wish the brow hairs to lay. You can play around with the style you like as you are applying the product
Step 7
Apply Saran Wrap over your brows, push gently to adhere to the solution and wait 8-13 mins.
Step 8
Again remove any excess with a dry cotton round. You will be able to see the results at this point and hopefully you will be as thrilled as I was
Step 9
Last step apply the NOURISHING oil and voila! Enjoy your fluffy defined brows
Step 10
Avoid getting your brows wet for 24 hours!
Don't be afraid if the brow hairs move over the next few weeks. They are not stuck in place and can be easily brushed back into place. I like to apply a little clear gel over my brows each day and fill them in lightly with this micro pen.
Watch the Brow Lamination Process
SHOP THE PRODUCTS
I have linked my exact kit as well as a few others as it keeps selling out.
Not ready to try brow lamination? try soap brows - a temporary process to achieve the same results
What Questions Do You Have About Brow Lamination?
Pin this post for future reference


Breast cancer survivor, lover of style, beauty and all things pink! Inspiring you to thrive through adversity.
READ MORE


Shop My Style & Beauty


![Adulting is realizing mystery boxes full of designer clothes are actually my love language 💀📦
I’ve been renting clothes for years, so I was VERY excited to try this concept from @armoire.style — pieces that have finished their rental era and are now ready for a permanent closet home 🎉🎉🎉
It honestly feels like thrifting, online shopping, and a surprise gift all rolled into one.
✨ designer brands
✨ unlimited rentals and swaps if thing don’t fit or work out
✨ real stylists to help curate pieces
✨ no laundry
✨ FedEx pickup from home
✨ and now mystery closet refreshes?!
Use my code [MYCANCERCHIC] for up to 60% off your first month + 2 free bonus items 🩷 @armoire.style](https://www.mycancerchic.com/wp-content/plugins/instagram-feed/img/placeholder.png)


4 Comments